SSH over VPN
Managing servers on the public internet brings a lot of security threats with it. RDP is so bad it isn't recommended to even expose it to the public internet. With SSH, things are a bit more safe, but only after you perform a set of SSH hardening tasks, e.g.:
- Change default SSH port (security through obscurity, only helps reduce number of bots attempting to connect)
- Disable root login
- Disable password login, only use PubKey authentication
- Setup 2FA for SSH
- etc.
In order to add another layer of protection, you can setup VPN to protect your SSH connections (while leaving your website available to the public internet).
Having SSH over VPN shouldn't make you forget about the aforementioned SSH hardening steps. VPN is just one of them.
Setup Wireguard onServer the serversetup
Install Wireguard on the server
Debian offers fairly outdated version of Wireguard in the official stable repository. At the time of writing, stable has 20210223, while testing has 20210424. You can check available version with apt.
$ apt-cache policy wireguardOutput:
wireguard:
  Installed: (none)
  Candidate: 1.0.20210223-1
  Version table:
     1.0.20210223-1 500
        500 https://ftp.sh.cvut.cz/debian bullseye/main amd64 Packages
Install from stable
You can decide if you want to use the stable or testing version. To install stable, simply type:
$ sudo apt install wireguardInstall from testing
To install from the testing repo, you have to perform the steps shown HERE. TLDR, add testing to /etc/apt/sources.list, adjust apt preferences in /etc/apt/preferences and update apt. Once you have enabled the testing repository with appropriate priorities, you can install Wireguard. To see if the preferences are set properly, try to see what apt would install. By default, everything should be installed from stable, unless specified otherwise.
$ apt-cache policy wireguardCandidate line shows what would be installed.
wireguard:
  Installed: (none)
  Candidate: 1.0.20210223-1
  Version table:
     1.0.20210424-1 -10
        -10 http://deb.debian.org/debian testing/main amd64 Packages
     1.0.20210223-1 900
        900 https://ftp.sh.cvut.cz/debian stable/main amd64 Packages
Now specify that you want to install from testing:
$ apt-cache policy -t testing wireguardCandidate should now point to the newer version:
wireguard:
  Installed: (none)
  Candidate: 1.0.20210424-1
  Version table:
     1.0.20210424-1 990
        990 http://deb.debian.org/debian testing/main amd64 Packages
     1.0.20210223-1 900
        900 https://ftp.sh.cvut.cz/debian stable/main amd64 Packages
Finally, to install from testing (-t to specify repository to install from):
$ sudo apt install -t testing wireguardGenerate keys
Regardless of the version you have installed, it's time to create the configuration, directories and keys. We will be working in a restricted directory (only readable by root), so elevate shell:
$ sudo su
(root)$
Create directories
We need some place to store our public, private and preshared keys. All of these should be located in /etc/wireguard directory and only readable by root. The directory structure itself is up to you, I prefer having directory keys in /etc/wireguard for server public and private key and psk directory for preshared keys.
Set umask to 077 to create files and directories only readable by root:
(root)$ umask 077Create the aforementioned directories in /etc/wireguard:
(root)$ mkdir keys pskGenerate server keys
(root)$ cd keys
(root)$ wg genkey | tee wg0_private.key | wg pubkey > wg0_public.key
The wg genkey command generates a random private key in base64 and prints it to standard output (terminal). The output is instead redirected to tee, which both prints it to stdout (terminal), but also saves it into a file wg0_private.key. The private key printed to stdout is then piped (| symbol) to wg pubkey, which calculates the public key and prints it in base64 to stdout from a corresponding private key (the one we redirected to it with the pipe), lastly redirect the public key from stdout to a file wg0_public.key
You will now have two files in /etc/wireguard directory. One containing public, the other private key.
wg0_private.key wg0_public.keyCreate server configuration
Still under umask 077 and in the root shell, create a config file in /etc/wireguard directory. The name of the file will be used as the name of the interface.
(root)$ touch wg0.confReplace server_private_key with the private key of your server (content of wg0_private.key in /etc/wireguard/keys). ListenPort is the port you want Wireguard to listen on and Address specifies the subnet for the Wireguard tunnel. I chose /29 due to small subnet size, because more hosts aren't necessary.
[Interface]
Address = 10.20.20.1/29
ListenPort = 51895
PrivateKey = server_private_key
Client Wireguard setup
Download and install Wireguard
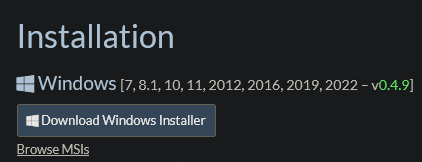
Download the Windows Installer from the official Wireguard website.
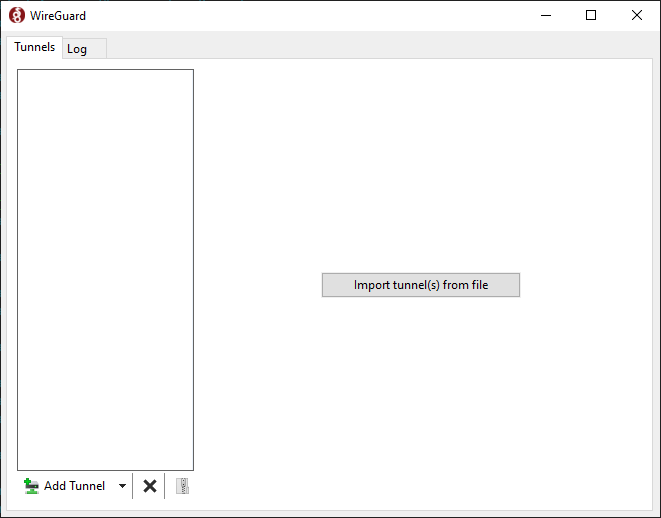
Run the wireguard-installer.exe and after a few moments, this window should appear:
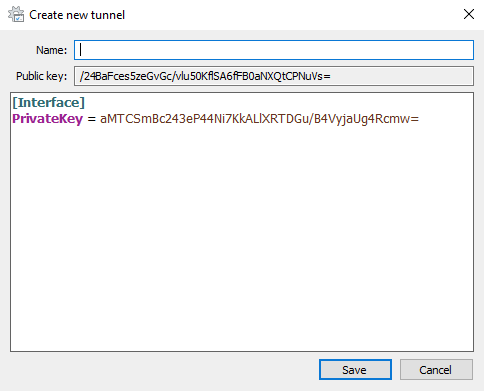
Click the arrow next to Add Tunnel and select Add empty tunnel...
Wireguard will automatically generate a private and public key for this client.
*note: all keys shown will be destroyed afterwards and are only used for demonstration purposes


