Paperless-ngx on Android (FOSS)
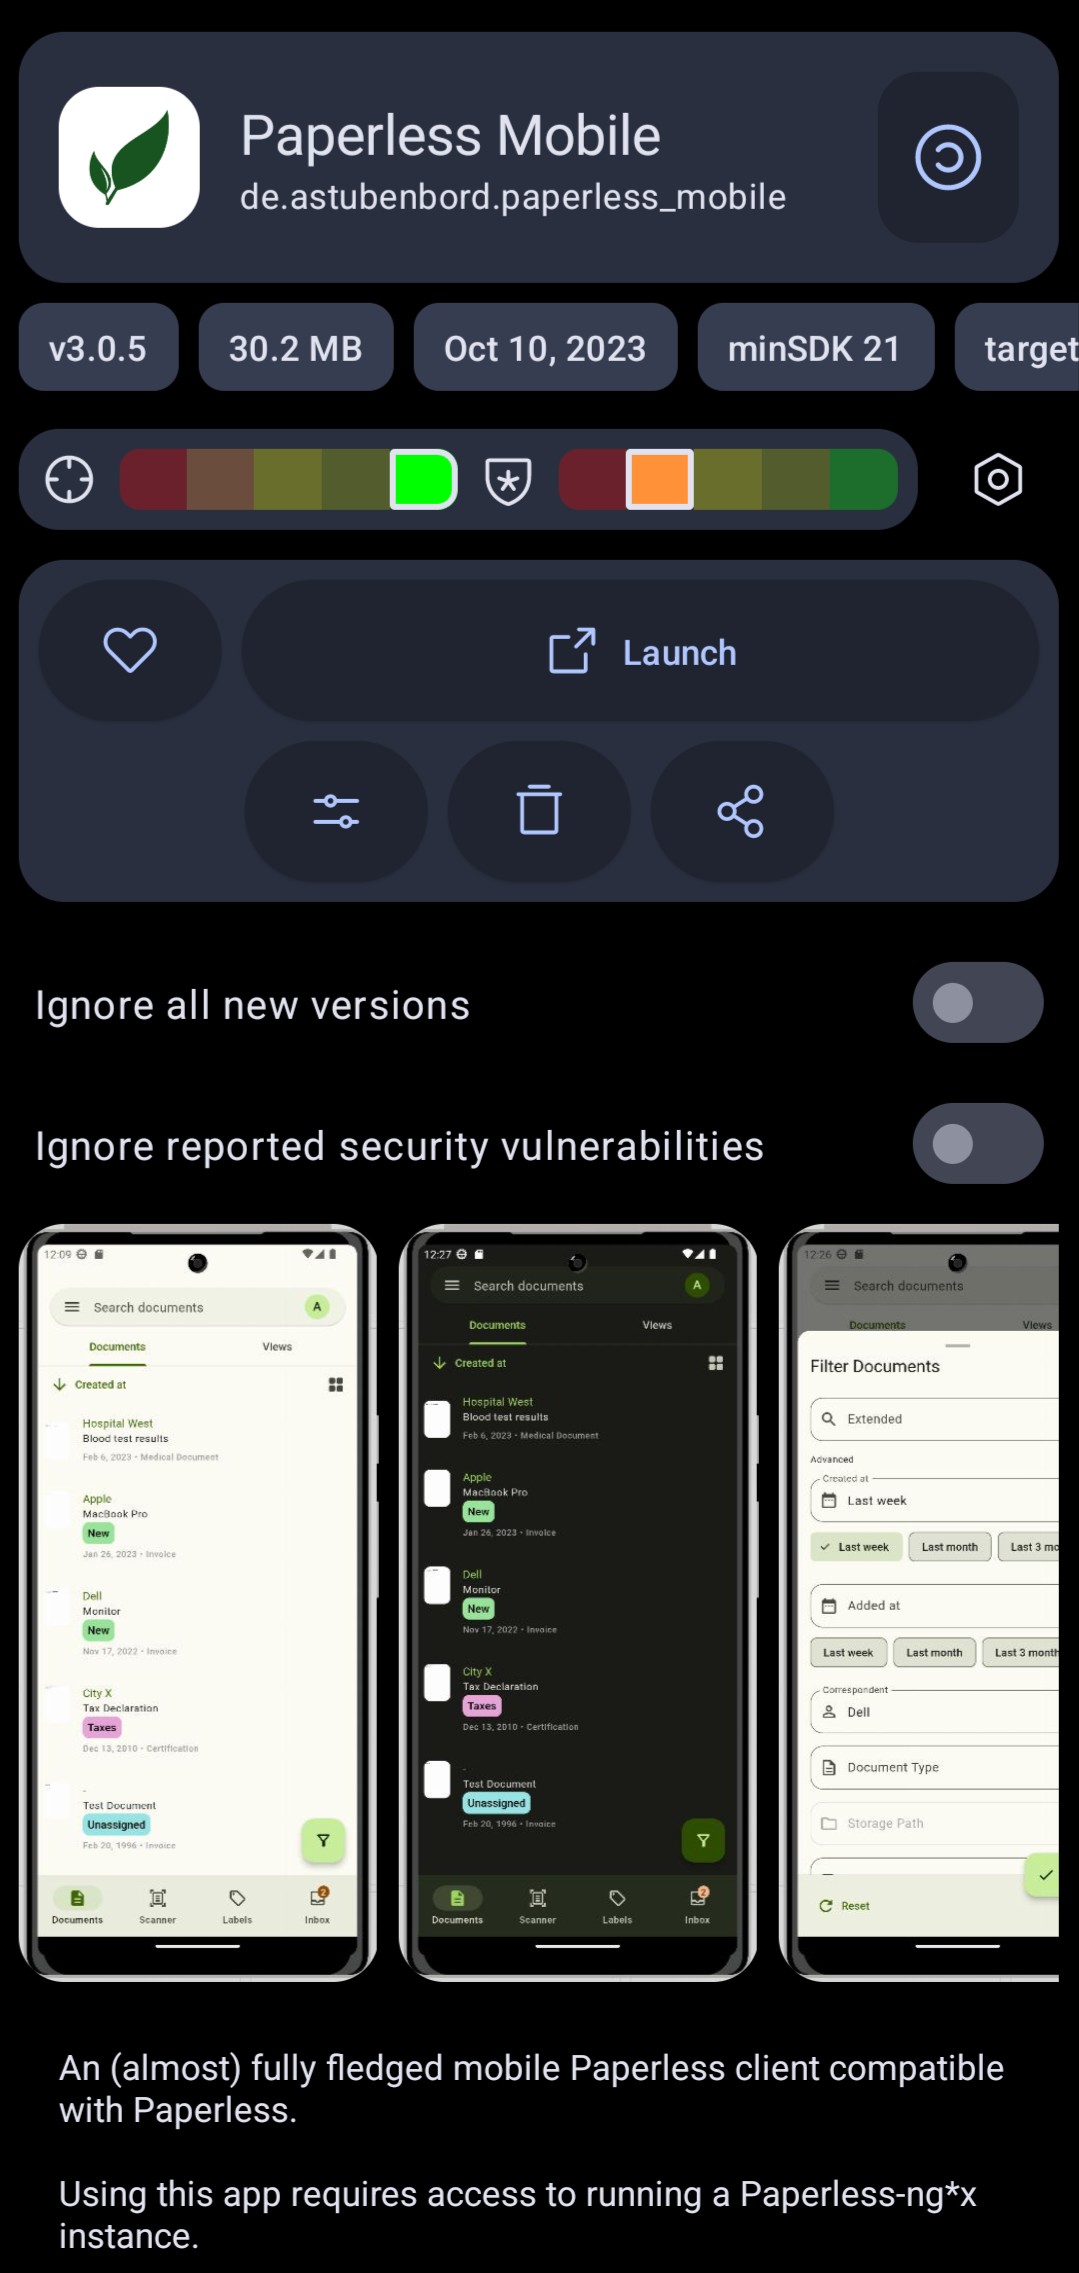
PaperlessPaperless-ngx has a couple of community Android client applications for accessing your selfhosted PaperlessPaperless-ngx instance. We will take a look at Paperless Mobile which is available on the IzzyOnDroid F-Droid Repository.
Installation
As mentioned above, you can install the application from F-Droid after adding the IzzyOnDroid repository. If you are using Neo Store, the repository should be available by default.
Preparation in Paperless-ngx
Decide which user you would like to use in the mobile app - most likely your main account where you store your documents.
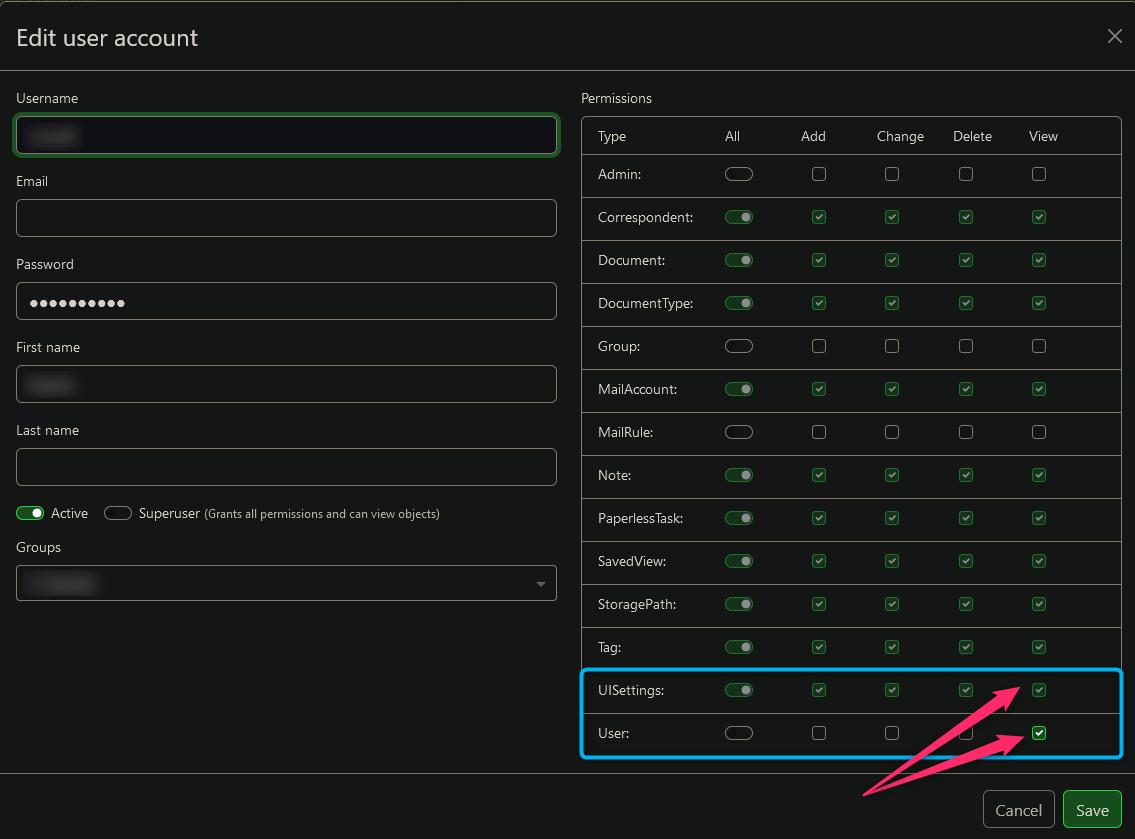
It's necessary to check permissions of said user to make sure it will work with Paperless Mobile. There's specifically 2 permissions you have to grant to the user.
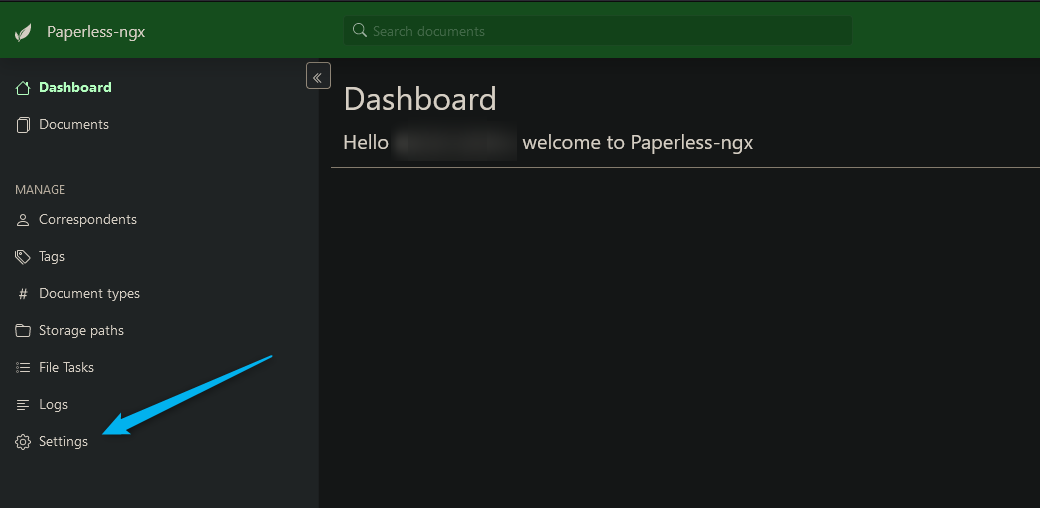
Login to your Paperless-ngx instance as an administrator through web interface and go to Settings.
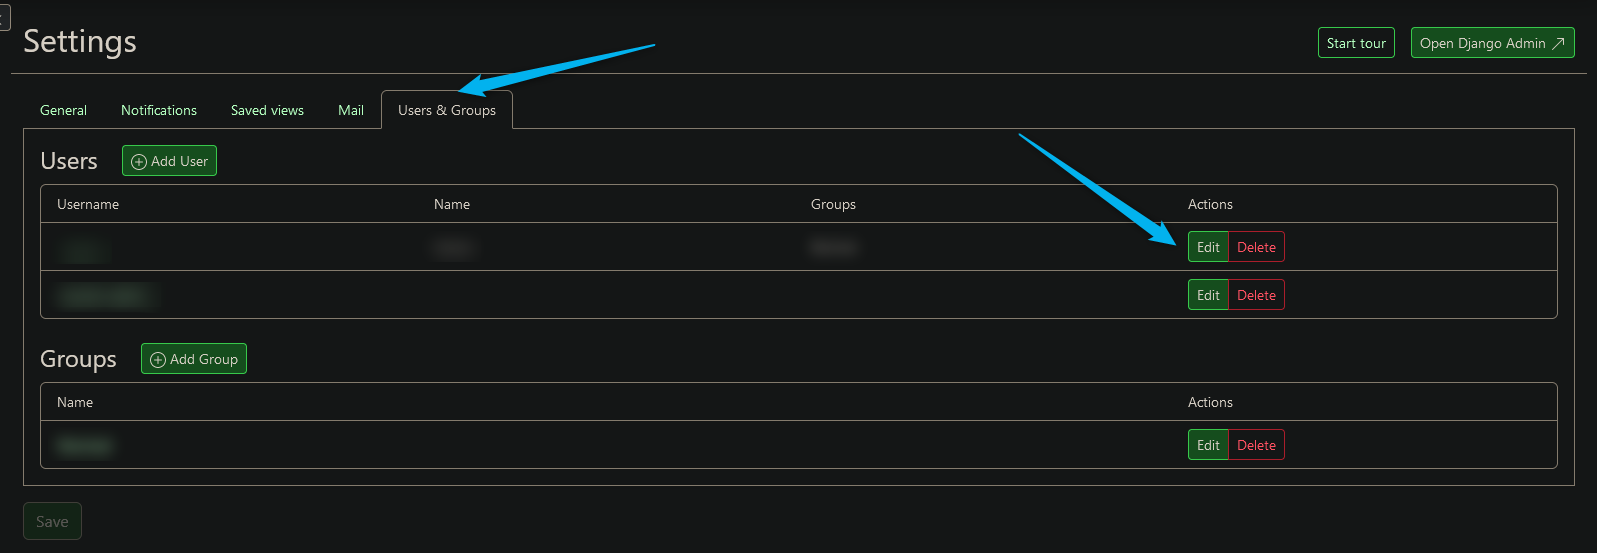
Click on Users & Groups and select Edit on the user you will be using.
Make sure that the user has the following permissions. If not, grant them:
- UISettings: View
- User: View
Click Save to apply the changes.
Setup in App
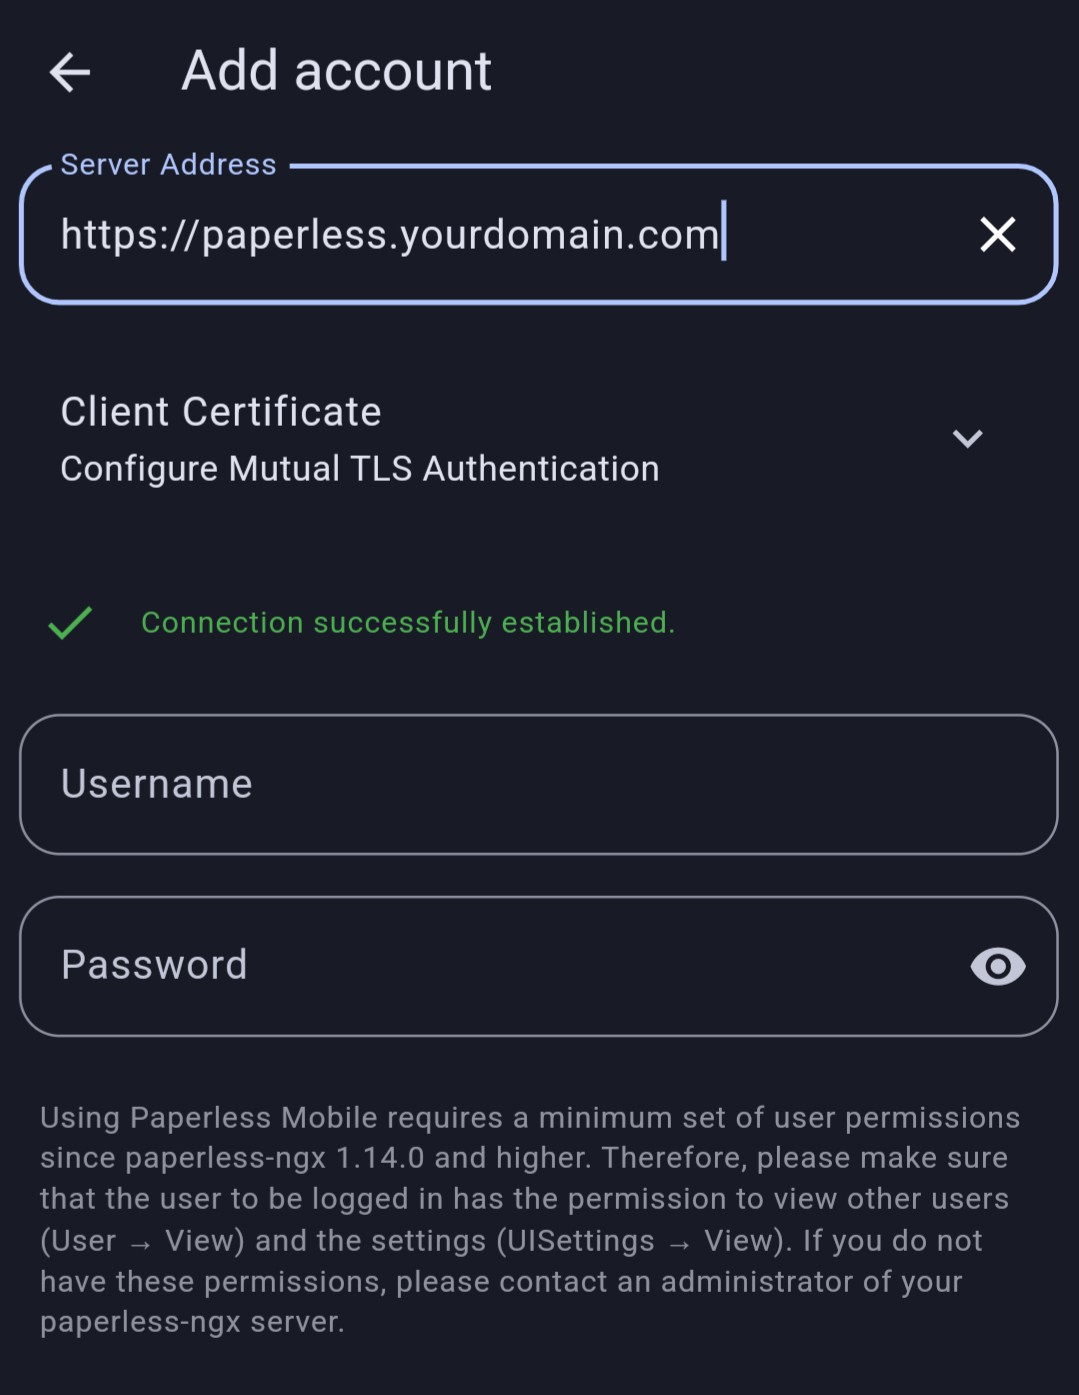
First of all, specify the address of your server. Depending on your setup, it could be an IP adress with a port, a domain name or any other HTTP or HTTPS endpoint. Even if you have a self-signed HTTPS certificate, it should not complain about it. You can also configure mTLS in case you want.
Don't be confused by the fact that the Sign In button is still grey even after you put in the server address - just press Enter on your Android keyboard and the app will try to connect to the server.
If you see a green text saying Connection successfully established. you are good to go. In case you get a timeout or other error, make sure you are connected to a network that can access your Paperless-ngx instance on the specified port (usually 80 or 443 or custom).
Now fill in the user credential and click Sign In.
If you have everything setup correctly, you will see your documents.

