Introduction and installation
Lately, I've been looking into some old laptops which I could spend my upcoming college years with. I wanted something cheap, but also good enough that I could use it for basic university related work. Of couse I could just buy a new low-end Windows laptop and be happy, but that would be a waste of money. Instead, I searched through used market for an old ThinkPad, T500 in particular. If you are a bit confused or haven't heard of Lenovo's ThinkPads and why they have a special place among many, I recommend you check out this guide. There are many newer models than the 2009's T500, however T500 seems to be the last "Librebootable" 15" ThinkPad. Flashing Libreboot is something I would love to do as well, but currently don't have the right tools to complete the process documented on the Libreboot wiki here. After T500 there are still a couple of pretty decent ThinkPad models, altough it is not possible to install completely Libre firmware on them.
Downloading OpenBSD
Downloading OpenBSD is pretty straightforward, just prepare two USB drives – one which we will boot the installer from and the other for our encryption key.
Head over to the download page and click on minirootXX.img
If you have a 64-bit machine, which the T500 is, select amd64. This will be a minimal intallation and we will only download file sets that we want during the install. If you do not care about this, you can pick one with the file sets already included.
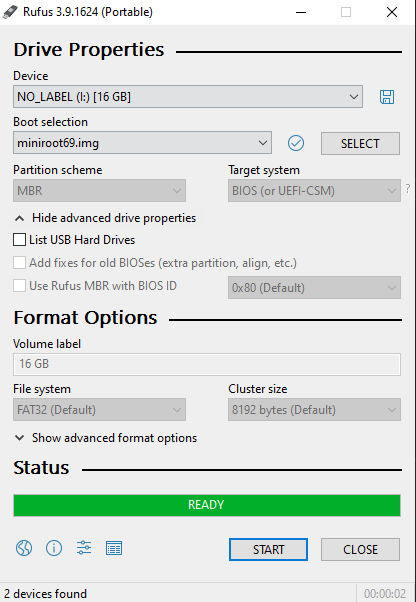
For those unfortunate people who still use Windows on their main machine like me, you may use utility like Rufus to burn the image to a USB. Just pick the file and drive, make sure to choose the right one, this will overwrite all data on the USB drive.
Once we have the USB ready, we can plug it into the T500, press F12 and choose to boot from it. We will be greeted by this screen:
[obrazek instalacky na zacatku]
Installing OpenBSD
Full disk encryption with key (FDE)
I'm using a laptop, so it would be advisable to implement some sort of encryption in case it gets lost or someone steals it. We will follow the official guide here (with a little modification) and setup FDE with a USB drive for convenience, so that we don't have to type the encryption password every time and instead rely on the possesion of the USB drive.
Jump out of the installer into the shell by typing S
Begin the proces by creating a device node. You may be familiar with the naming convetion from Linux. sd is essentially SCSI disk driver.
# cd /dev && sh MAKEDEV sd0We may also want to write some random data to the device, this is a fairly time consuming process, so get some coffee and do some work while it does it's thing. The bigger the drive, the longer this will take. The computer's speed also plays a big role. Wait, what is rsd0c? Haven't we just typed in sd0? Why are we writing something to rsd0c? I had the same questions, but the explanation if quite simple. R in the beginning stands for raw, as it is a raw (character) device. sd0 was already explained above (first SCSI driver device), but why c at the end? According to disklabel(5) "The ‘c’ partition is reserved for the entire physical disk". So there we have it, rsd0c points to the whole raw first hdd handled by the SCSI driver, to which we are currently writing random data.
# dd if=/dev/urandom of=/dev/rsd0c bs=1mSince we have a crap load of time before it finishes, let's dissect the command a little further. dd is a well known utility from the world of Linux and other UNIX-like operating systems. It can be used to copy standard input (stdin) to standard output (stdout). These two aforementioned terms usually mean "what you type" and "what you get" to/from the terminal. In this case we are using the if and of options of dd which replace stdin and stdout with files. Basically copying the contents of /dev/urandom to /dev/rsd0c. As you can tell by the fact that urandom resides in /dev, it is some kind of a device, but not a physical one. Together with random, urandom is a data source device which provides high quality pseudo-random data. Why is it called pseudo-random? Well, computers can't actually produce truly random data (but they can use realisitcally random sources), instead, the kernel utilizes all sorts of different things that are happeing at any given moment (system activity, network, hadware output) and through some programming and math trickery output seemingly random data. It is important to make sure that the same data cannot be generated again, because that could lead to security issues, since actions like generating SSH key pairs use these pseudo-random data sources. (Imagine you generate an SSH key pair and someone finds a way to get the same pseudo-random output that you got, which will result in the same SSH key pair being generated, even though I'm sure there are reasons why this isn't realistically possible). The last option bs specifies the block size (how large the blocks of data will be)


