Quick Tips
General and quick tips, commands and utilites. No deep dive, just simple oneliners.
- Copy from Linux to Windows – SCP
- See what apt would install (Debian/Ubuntu)
- Edit previous commands in shell before running them
- Customize date and time in Windows
- Kill X server on OpenBSD (switch to terminal)
- Create encrypted ZFS pool in Proxmox
Copy from Linux to Windows – SCP
- You need to copy file from Linux machine to Windows quickly
- You have SSH access to the Linux machine from Windows
- You have scp installed
Type this to PowerShell/Windows Terminal on your Windows machine
scp -P [SSH port] linuxusername@ip_of_linux:/path/to/your/file.tar C:\Path\to\save\the\fileOmit the -P option if you are using default SSH port 22.
See what apt would install (Debian/Ubuntu)
See what apt would install without actually installing the package:
$ sudo apt install --dry-run packagename

or

$ sudo apt install packagename --dry-run
Edit previous commands in shell before running them
Let's say you run a certain command with some parameters (like opening a file in vim). Then you want to run basically the same command, but instead of opening the file in vim, you just want to view the contents with cat.
The most common way of doing this would be either:
- Writing the whole command again like this (very slow)
sudo cat /etc/apt/sources.list.d/nginx.list - Clicking the arrow up button on you keyboard to bring up the previous command (
sudo vim /etc/apt/sources.list.d/nginx.list) and then changingvimtocatby moving the cursor using arrow key on the line or some other shortcut- This is the way I usually used to do it, but found it oftentimes pretty tedious - especially jumping to the word, deleting it and writing a new one
Recently I found out you can do it a different way and it's acually better for my workflow once I got used to it.
- Run the command you want to run first
sudo vim /etc/apt/sources.list.d/nginx.list - Then if you want to do the same thing, but just with
cat, write this in the shell and then hit enter!!:gs/vim/cat
As you can see below, this will run the previous command, but replacing the word vim with cat
user~$ sudo vim /etc/apt/sources.list.d/nginx.list
user~$ !!:gs/vim/cat
sudo cat /etc/apt/sources.list.d/nginx.list
deb [signed-by=/usr/share/keyrings/nginx-archive-keyring.gpg] http://nginx.org/packages/mainline/debian bookworm nginx!!- Bring up the previous command:gs- Global search and replace - https://unix.stackexchange.com/questions/116623/xy-unix-trick-for-all-instances-in-last-command/116626#116626/vim/cat- Replace the wordvimwithcat
This can be useful e.g when you edit a file and then want to print out the edited contents into the shell to copy to a ticket or documentation.
Customize date and time in Windows
This is likely one of very few tips in Windows.
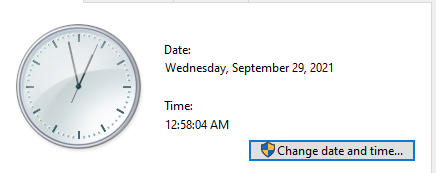
Since Windows 8, Windows is stuck in a phase of migrating settings from the old Control Panel to the new Settings. This isn't necessarily a bad thing, until you realize that these migrations like dropping features along the way. Then you end up with fractured and incomplete settings. This is the case for Date & Time setting section as well. I have Windows in English, but want date/time in a different format, that isn't available under the locale. Fortunately, the old Control Panel allows you to define your own date and time formats. This tip works as of Windows 10 version 20H2, you never know when Microsoft decides to break this.

Change date and time
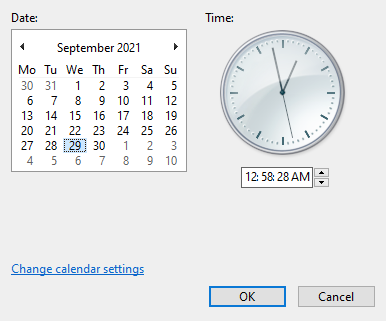
Change calendar settings
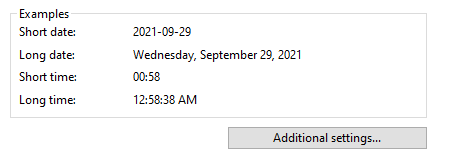
Additional settings
Here you will find four tabs regarding Numbers, Currency, Time and Date. Click on Date for example and you can define you own date formats with y, m and d.
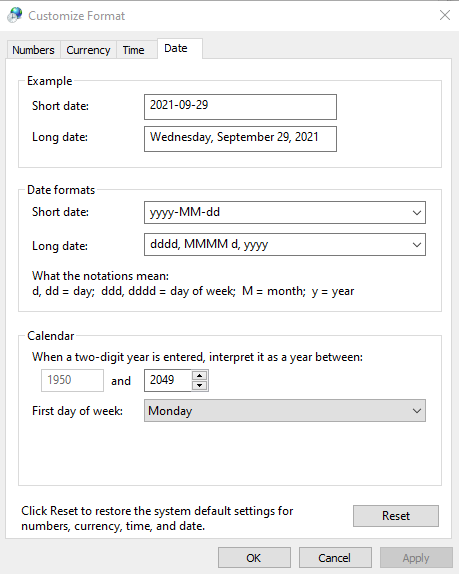
For the classic ISO style date 2021-09-29, type yyyy-MM-dd into the Short date field.
Kill X server on OpenBSD (switch to terminal)
If you find yourself stuck on a OpenBSD login screen, or you simply do not wish to login and start X server and you would rather go to the command line login, simply press Ctrl + Alt + F1 and it goes immediatelly into tty.
Create encrypted ZFS pool in Proxmox
There are some things you can't do using the Proxmox GUI, like creating an encrypted ZFS pool. Good thing is that it's possible, you just have to bring out the CLI.

First of all, connect to your Proxmox host using SSH.
ssh root@proxmox.domainNow let's generate an encryption key, choose a name and location of your liking.
dd if=/dev/random of=/root/proxmox-zfs.key bs=32 count=1Decide which drives you want to add to the ZFS pool. You can list the available drives by their Serial Number (SN) like this:
ls /dev/disk/by-id/*/dev/disk/by-id/ata-ST20000NM007D-3DJ103_XXXXXXX
/dev/disk/by-id/ata-ST20000NM007D-3DJ103_AAAAAAA
/dev/disk/by-id/ata-ST20000NM007D-3DJ103_BBBBBBBThis allows you to easily match the actual drives in your system with what you see in Proxmox. I can certainly recommend keeping track of where the drives are in your case - it helps greatly when one of them fails and you need to replace it.
What else do we want to enable on our pool? There's a couple of options we might want to add. Here's a link that will give you some information - https://www.high-availability.com/docs/ZFS-Tuning-Guide/ But of course, feel free to do the research yourself.
| Property | Recommended Value | Description |
|---|---|---|
| ashift | 12 | 4KiB block size |
| atime | off | Do not update atime on file read |
| recordsize | 64KiB | Smaller record sizes for databases (match the database block size) |
| recordsize | 128Kib | Standard usage (mixture of file sizes) |
| recordsize | 1Mb | Recommended for large files |
| compression | lz4 | Set compression to use the lz4 algorithm |
| xattr | sa | Store Linux attributes in inodes rather than files in hidden folders |
Here's the final command. Please, make sure the settings above, especially recordsize, meet your needs. The default is 128Kib.
zpool create -O encryption=on -O keyformat=raw -O keylocation=file:///root/proxmox-zfs.key -o ashift
=12 -O compression=lz4 -O atime=off -O xattr=sa proxmox-zfs raidz1 /dev/disk/by-id/ata-ST20000NM007D-3DJ103_XXXXXXX /dev/disk/by-id/ata-ST20000NM007D-3DJ103_AAAAAAA /dev/disk/by-id/ata-ST20000NM007D-3DJ103_BBBBBBB /dev/disk/by-id/ata-ST20000NM007D-3DJ103_CCCCCC
I'm using RAIDZ1 here, which is basically RAID 5, meaning that the pool can tolerate a failure of 1 drive. You can choose other configuration that meets your needs.
You can then check the pool status
root@proxmox:~# zpool status
  pool: proxmox-zfs
 state: ONLINE
  scan: scrub repaired 0B in 20:23:51 with 0 errors on Sun Jan 14 20:47:53 2024
config:

        NAME                                  STATE     READ WRITE CKSUM
        proxmox-zfs                           ONLINE       0     0     0
          raidz1-0                            ONLINE       0     0     0
            ata-ST20000NM007D-3DJ103_XXXXXXX  ONLINE       0     0     0
            ata-ST20000NM007D-3DJ103_AAAAAAA  ONLINE       0     0     0
            ata-ST20000NM007D-3DJ103_BBBBBBB  ONLINE       0     0     0
            ata-ST20000NM007D-3DJ103_CCCCCCC  ONLINE       0     0     0
The pool should also now be visible under your Proxmox node --> Disks --> ZFS

(yours will be empty, I already have data here)
To be able to use this pool in Proxmox for VMs or Containers, we need to create a ZFS Storage as well. Go to the Datacenter view --> Storage and click on ZFS

Here's where you can also pick the Block Size, which is volblocksize for zvols. This is better explained here:
- https://blog.zanshindojo.org/proxmox-zfs-performance/
- https://klarasystems.com/articles/tuning-recordsize-in-openzfs/
- https://ibug.io/blog/2023/10/zfs-block-size/
- https://openzfs.github.io/openzfs-docs/Performance%20and%20Tuning/Workload%20Tuning.html#dataset-recordsize
- https://jrs-s.net/2019/04/03/on-zfs-recordsize/
You can also enable Thin provision if you'd like.

You will now see the storage under you Proxmox node and you should be able to add disks to VMs using this storage.

You can actually create multiple of these on the same underlying ZFS pool. The reason for that might be that you want to use different Block Sizes (volbocksize) for OS/Swap/Database etc.