Debian 11 XFCE
- XFCE keyboard shortcuts
- Lock xfce with Windows + L
- Disable emoji annotation (IBus Preferences)
- Show desktop with Windows + D
- Snap Windows to sides
- Open Whisker menu with Windows key
- System
- Install Slack
XFCE keyboard shortcuts
Change default keyboard bindings in XFCE
Lock xfce with Windows + L
Default settings
To lock a screen in Xfce by default either:
- Type
xflock4in the terminal - Press
Ctrl + Alt + L
Because the Windows key is basically useless on Linux, I want to bind some shortcuts to it.
Change keyboard shortcut
1. To change Keyboard shortcuts, open Settings Manager --> Keyboard --> Application Shortcuts. There you will be able to see all current shortcuts.
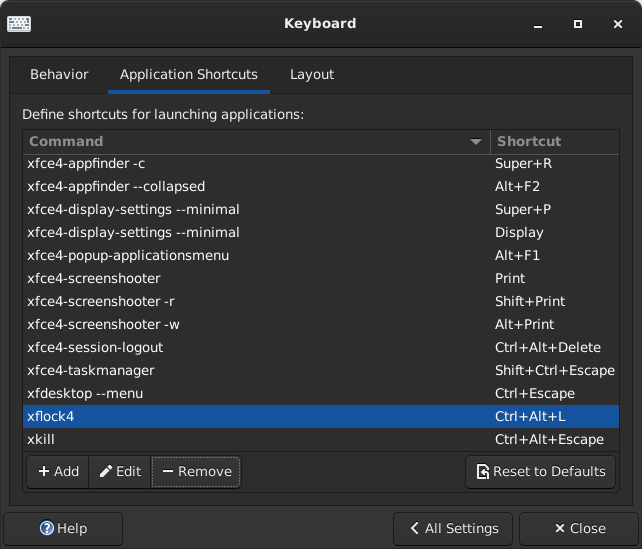
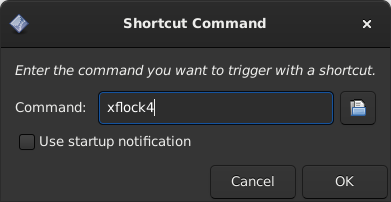
2. To add a new one, press the Add button at the bottom, type the name of the command you would like to launch with that shortcut and press OK. You will then be prompted to press the desired key combination. I am used to Windows + L, so I set it that way.
3. Delete the previous shortcut Ctrl + Alt + L or keep it.

Disable emoji annotation (IBus Preferences)
I have recently found out that the key combination Ctrl + Shift + E in my Xfce Debian 11 does something else than I expected. I use it in Bookstack to change a selected part of text to inline code style like this. Instead of this however, it calls an Emoji annotation (which, frankly, I will never use).
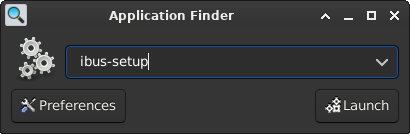
1. To disable this shortcut, open ibus-setup (Applications --> Run program or type ibus-setup in Terminal).
2. This will open IBus Preferences, go to the Emoji tab
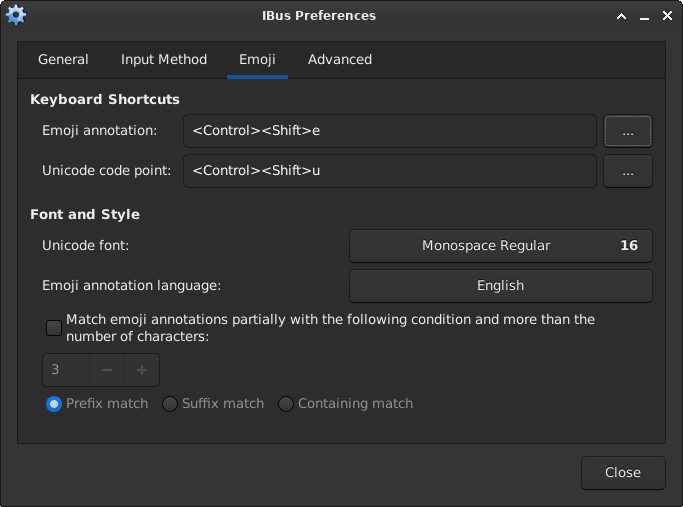
3. There, click on the three dots button next to Emoji annotation, select the shortcut and press Delete.
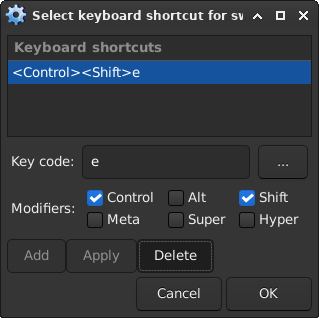
4. The Emoji annotation should now be empty and shouldn't interfere with other application shortcuts.

Show desktop with Windows + D
Again, Ctrl + Alt + D is set as a default shortcut to show desktop. Unfortunately I haven't found it in the Keyboard shortcut settings, so I will have to use the more advanced Settings Editor.
1. Settings Manager --> Settings Editor

2. Find Channel xfce4-keyboard-shortcuts and locate a Property with show_desktop_key value.

3. Click on this Property and press the Reset button. This will basically delete the Property and Ctrl + Alt + D won't work for showing the desktop anymore.

4. Now add a new Property /xfwm4/custom/<Super>d with the same Value (show_desktop_key) and Type String
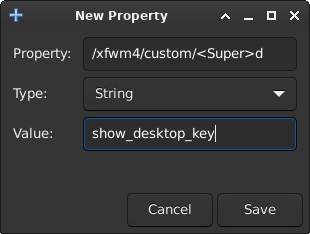 5. Click Save and that's it.
 Windows + d will now work.
Snap Windows to sides
If you are coming from Windows, you might be familiar with the concept of snapping windows to the left/right side of the screen or to the corners. This is possible within Xfce as well, albeit not as smooth. Without shortcuts, this works by dragging windows to the part of the screen you want it to snap to.
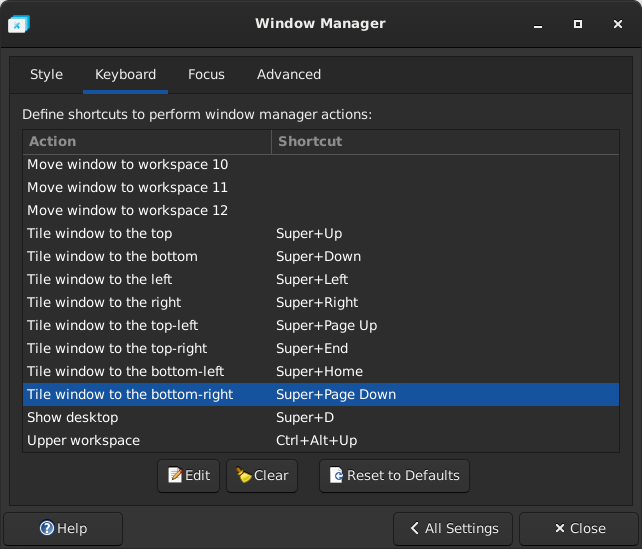
1. Go to Settings Manager --> Window Manager
2. Open it and go the the Keyboard tab. "Tile window to the X" is the setting you are looking for, click Edit and change it to what suits you.
Open Whisker menu with Windows key
EDIT: There's bug in Xfce (or maybe a feature) that makes it impossible to use shortcuts with only one modifier key, in this case the Windows key. Basically, if you have a keyboard shortcut that uses the Windows/Super key, e.g Super + Up and then you make Super alone open the Whisker menu (or something else), Super + Up shortcut stops working! To fix this, check the bottom of the article.
If you come from Windows, you are very likely used to pressing the Windows button and typing a name of an application to launch it. You can achieve the same with Xfce's Whisker menu. Unfortunately it isn't called with the Windows (Super on non-Windows OSs) key by default. You can change it of course, it's Linux!
1. Go to Settings Manager --> Keyboard --> Application Shortcuts
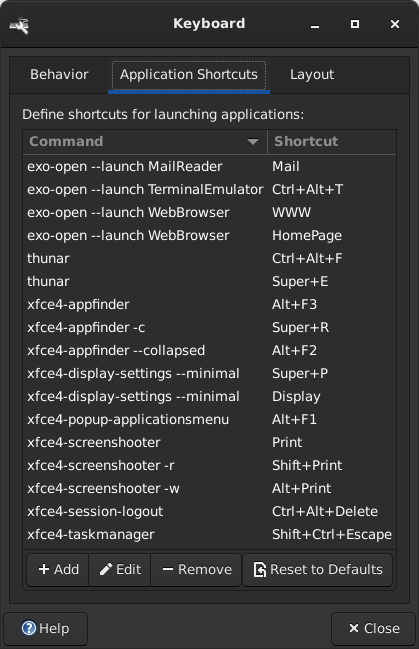
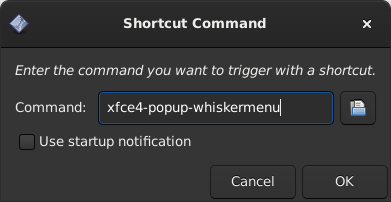
2. Click the Add button and point it to xfce4-popup-whiskermenu
3. Click OK and press your desired key combination (only the Super key in my case).
Done! Pressing the Super/Windows key will now bring up Whisker menu and you can start typing immediately to launch an app you want.
As mentioned at the beginning of this article, there's a problem with using only one modifier key alone as a shortcut, which makes (most) other shortcuts using this modifier key stop working. You will have to download this utility to fix it: https://github.com/hanschen/ksuperkey
Unfortunately I haven't made this working yet and decided dropping this shortcut for now.
System
Add user to sudo
You most likely already have sudo installed (should be installed by default in Debian 11). Because of that, the sudo group already exists and is in /etc/sudoers file. The only thing we have to do is add our user to the sudo group.
Add user to sudo group
1. Login as root
2. Add user username to sudo group
(root)$ usermod -aG sudo username-aadds user to a new supplementary group-Gspecifies the name of the group to append to the user
3. Check whether your user is in the sudo group
(root)$ groups username
username : username cdrom floppy sudo audio dip video plugdev netdev bluetooth lpadmin scanner
As you can see from the output, sudo is on of the groups username is in.
4. Log out of root, login as your user and try to use sudo do execute a privileged command like apt upgrade. You will be prompted for a password (your user password, not root password). If you type it in correctly, and the command works, you have appropriate privileges, if not, you will be warned that the user isn't in the sudoers file.
Don't forget to actually log off root before logging back as your user. Your mileage may vary, but when I didn't do that, sudo didn't reload config and thought I wasn't in the sudoers file.
Disable password for sudo
If you have a really long password like me, you probably don't want to type it in every time you use sudo. By default, there's a timeout in sudo that allows you to execute multiple elevated commands before asking you for a password again. However, if you never want to be asked for a password when running sudo, you need to edit a configuration file.
1. Backup the current sudoers file in case something goes wrong.
$ sudo cp /etc/sudoers ~/2. Edit the sudoers file with visudo to avoid making syntax mistakes (visudo does basic checks).
$ sudo visudoThis will happen if you make a syntax mistake:
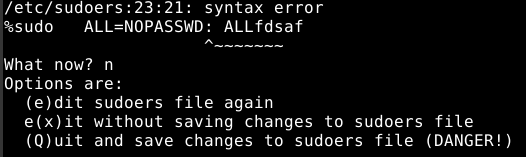
3. Edit the line with %sudo and make it look like this. sudo has very powerful configuration, man sudoers for more.
# Allow members of group sudo to execute any command
%sudo	ALL=NOPASSWD: ALL
4. Log out or reboot and test if it works.
Disable root account
You might want to disable your root account from logging in.
1. Disable the account (remove password)
$ sudo passwd -d root2. Lock the account (adds ! to /etc/shadow)
$ sudo passwd -l rootNow logging in as root shouldn't be possible, but you can still elevate to it with sudo su.
Install Slack
Slack isn't FLOOS, therefore it isn't included in the Debian repository (there might be other reasons to it). In order to install Slack, you will need to download .DEB file manually.
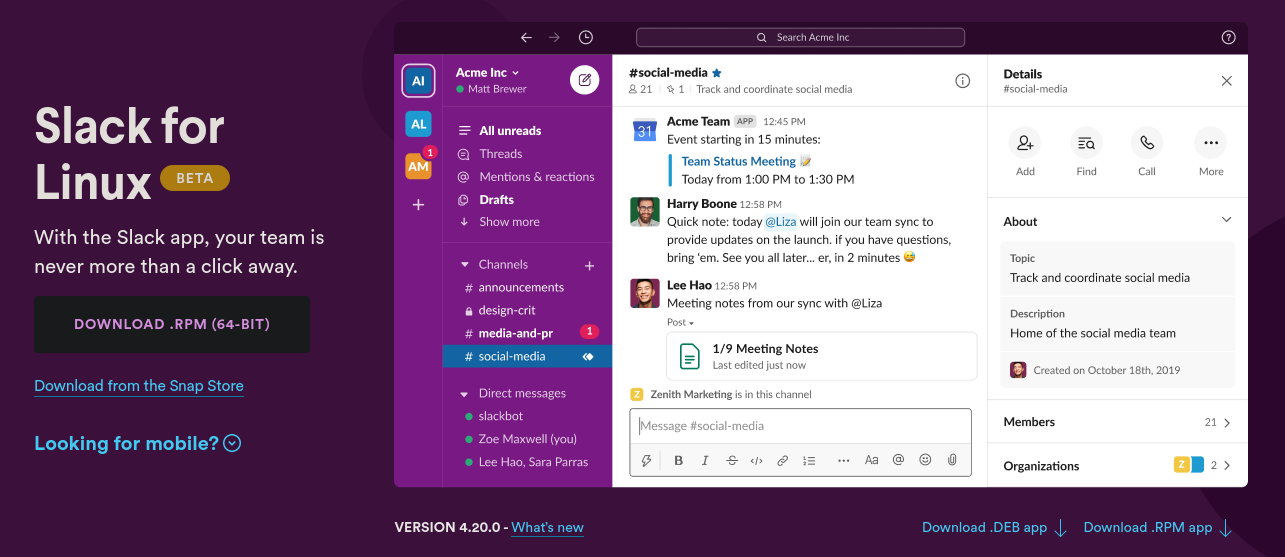
1. Go to https://slack.com/intl/en-cz/downloads/linux and download the .DEB file

2. Unfortunately, if you had tried installing it right away, you would get dependency error.
$ sudo apt install ./slack-desktop-4.20.0-amd64.deb

Reading package lists... Done
Building dependency tree... Done
Reading state information... Done
Note, selecting 'slack-desktop' instead of './slack-desktop-4.20.0-amd64.deb'
Some packages could not be installed. This may mean that you have
requested an impossible situation or if you are using the unstable
distribution that some required packages have not yet been created
or been moved out of Incoming.
The following information may help to resolve the situation:

The following packages have unmet dependencies:
 slack-desktop : Depends: libappindicator3-1 but it is not installable
E: Unable to correct problems, you have held broken packages.
3. To fix this, run the following command to unpack and edit the .DEB file (in the folder where you have downloaded it)
$ dpkg-deb -x slack-desktop-4.20.0-amd64.deb unpack
$ dpkg-deb --control slack-desktop-4.20.0-amd64.deb
This will leave you with two new folders, unpack and DEBIAN.

4. Move the DEBIAN folder to the unpack folder.
$ mv DEBIAN/ unpack/5. Open the file and replace libappindicator3-1 with libayatana-appindicator3-1
$ nvim unpack/DEBIAN/control...
Depends: libgtk-3-0, libappindicator3-1, libnotify4, libnss3, libxss1, libxtst6, xdg-utils, libatspi2.0-0, libuuid1, kde-cli-tools | kde-runtime | trash-cli | libglib2.0-bin | gvfs-bin, apt-transport-https
...to
...
Depends: libgtk-3-0, libayatana-appindicator3-1, libnotify4, libnss3, libxss1, libxtst6, xdg-utils, libatspi2.0-0, libuuid1, kde-cli-tools | kde-runtime | trash-cli | libglib2.0-bin | gvfs-bin, apt-transport-https
...
6. Go back to the directory where you have the folder unpack and build the .DEB package again with:
$ dpkg -b unpack slack.debThis will build the package and save it as slack.deb
7. Install the newly build slack.deb with apt.
$ sudo apt install ./slack.debReading package lists... Done
Building dependency tree... Done
Reading state information... Done
Note, selecting 'slack-desktop' instead of './slack.deb'
Suggested packages:
gir1.2-gnomekeyring-1.0 libgnome-keyring0
The following NEW packages will be installed:
slack-desktop
0 upgraded, 1 newly installed, 0 to remove and 0 not upgraded.
Need to get 0 B/63.1 MB of archives.
After this operation, 148 MB of additional disk space will be used.
Get:1 /home/marek/Downloads/slack.deb slack-desktop amd64 4.20.0 [63.1 MB]
Selecting previously unselected package slack-desktop.
(Reading database ... 247528 files and directories currently installed.)
Preparing to unpack .../home/marek/Downloads/slack.deb ...
Unpacking slack-desktop (4.20.0) ...
Setting up slack-desktop (4.20.0) ...
Processing triggers for desktop-file-utils (0.26-1) ...Slack should be now installed and called through Terminal or application launcher.